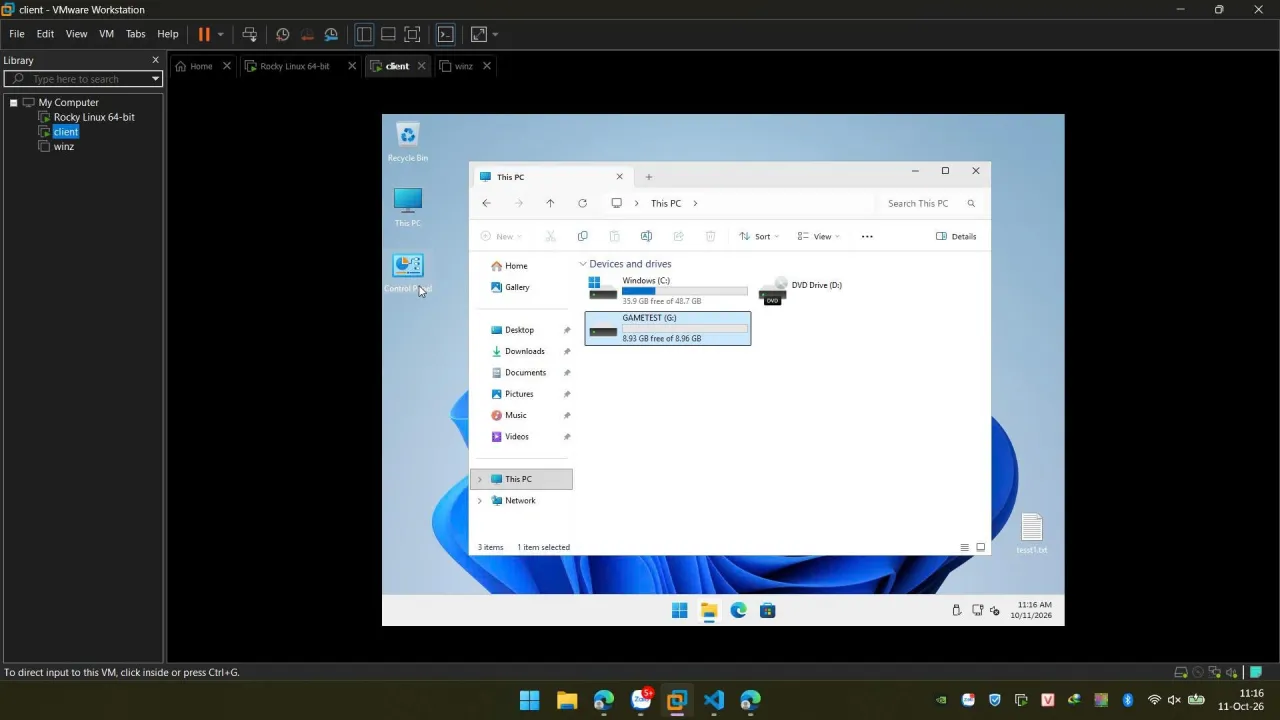
Broom is free, open-source diskless boot software for internet cafés, gaming centers and school labs, up to about 100 PCs per server. You install Windows 11 Pro once in a virtual machine and upload it to the server; every client network-boots from that image, and every restart brings the client back clean — whatever a customer installed or deleted is gone.
What you get
- Clean after every boot — everything a customer writes lands on the client’s SSD and is wiped at the next boot.
- A one-file server — runs on any Linux (tested on Debian/Ubuntu and Rocky Linux 10); no separate DHCP, TFTP or iSCSI to install: all of it is built into Broom.
- Clients as fast as a local install — the image is kept on each PC’s SSD and Windows runs straight from it; the network is only used when there is a new image, so the server stays light even when the whole room boots at once.
- Shared iSCSI disks (games, apps) — games live on their own iSCSI disk, not in the image. Update a game on one PC, press Save, and the whole room has it at its next boot; PCs in the middle of a game keep the old version until they restart.
- Secure Boot without MOK — the whole network boot chain is already signed, no key to enroll on any PC. Secure Boot, TPM 2.0 and HVCI are all on, so FACEIT Anti-Cheat runs (details).
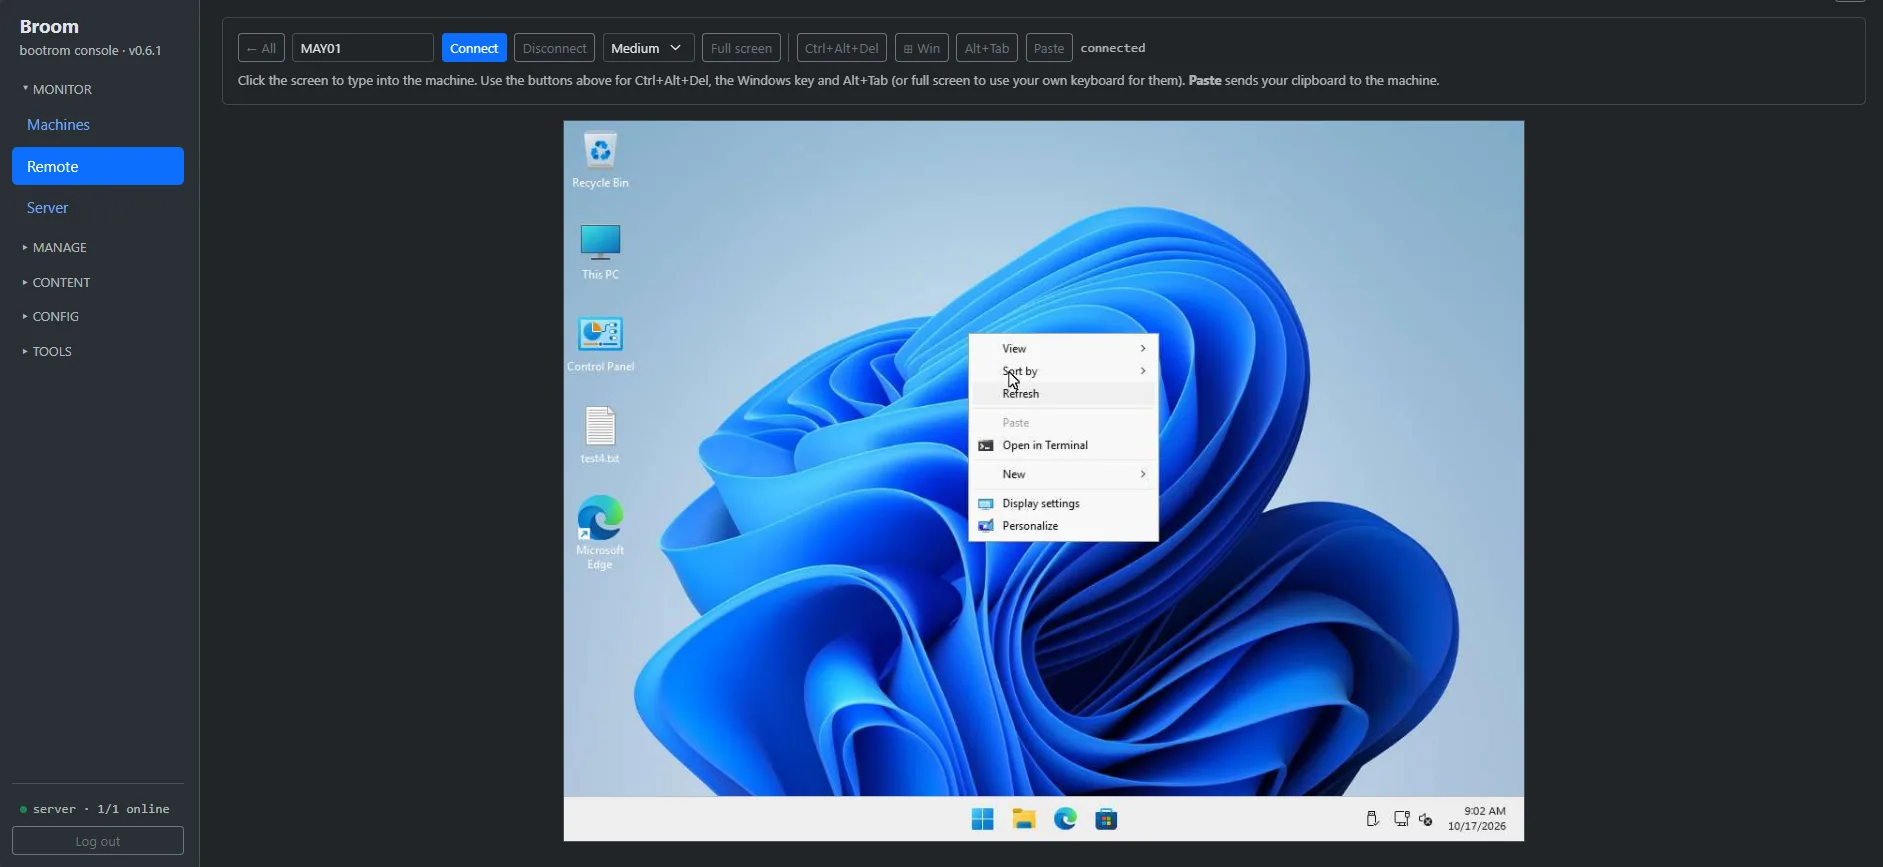
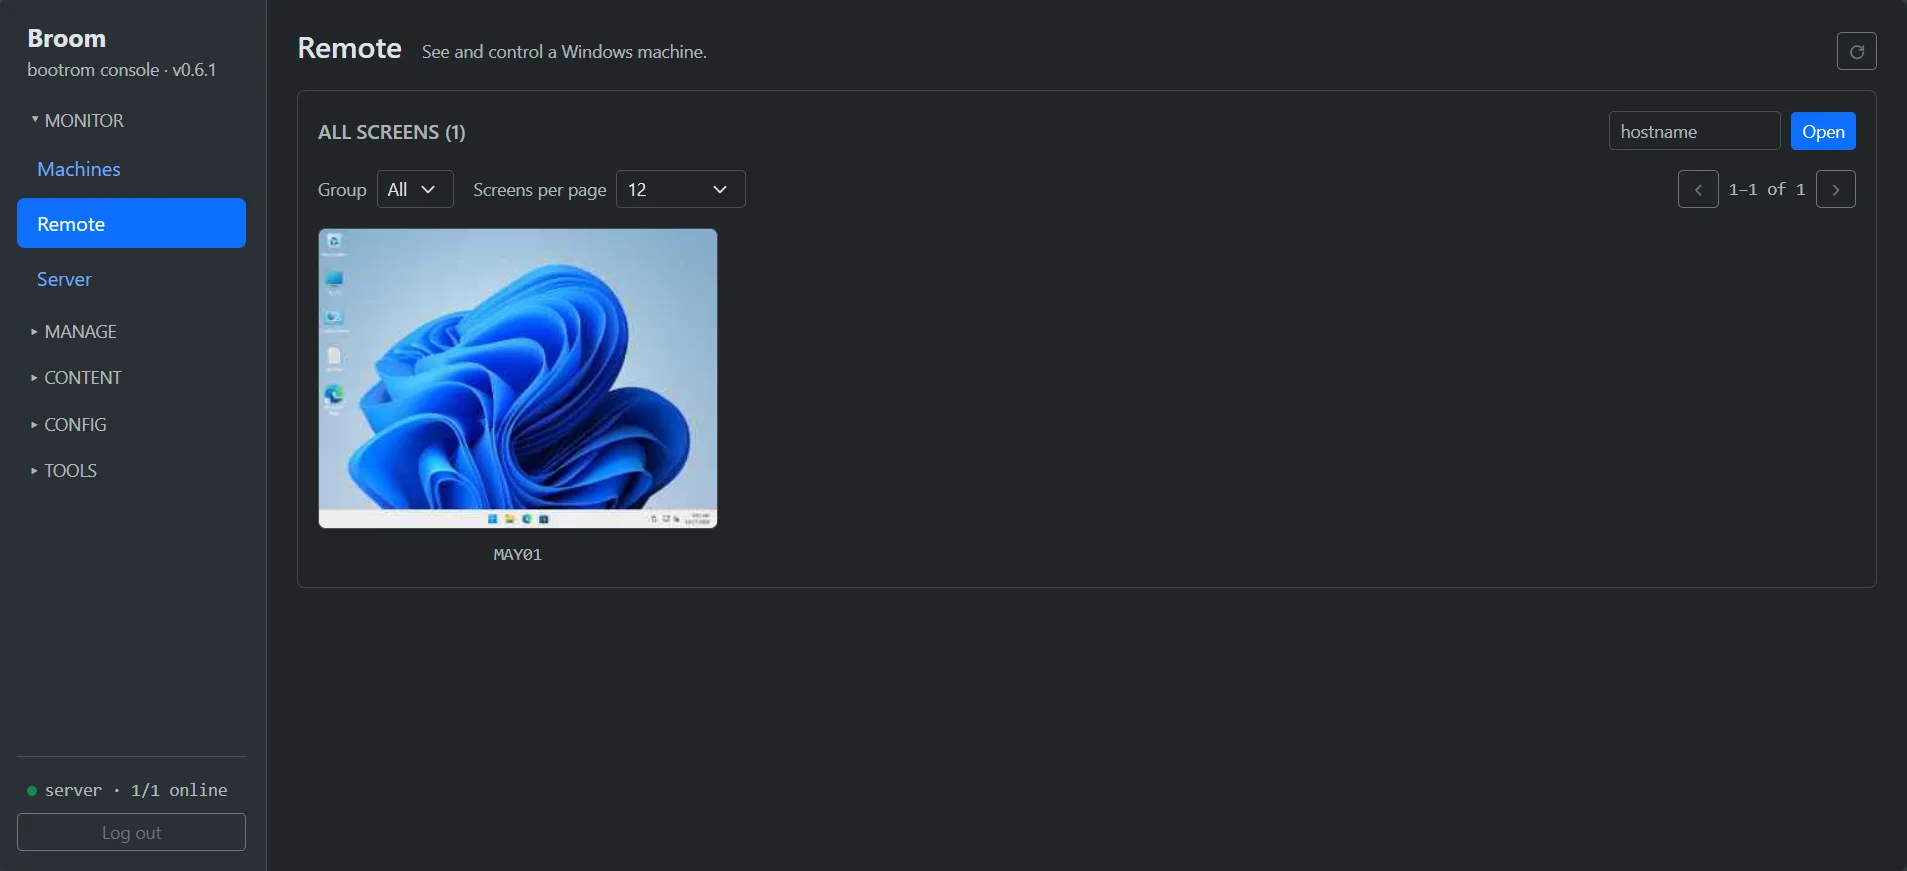
- Watch and control the clients in the browser — one page shows every PC’s screen live; click one to use its mouse and keyboard as if you sat there, full-screen games included. No VNC to install, no port open on the clients.
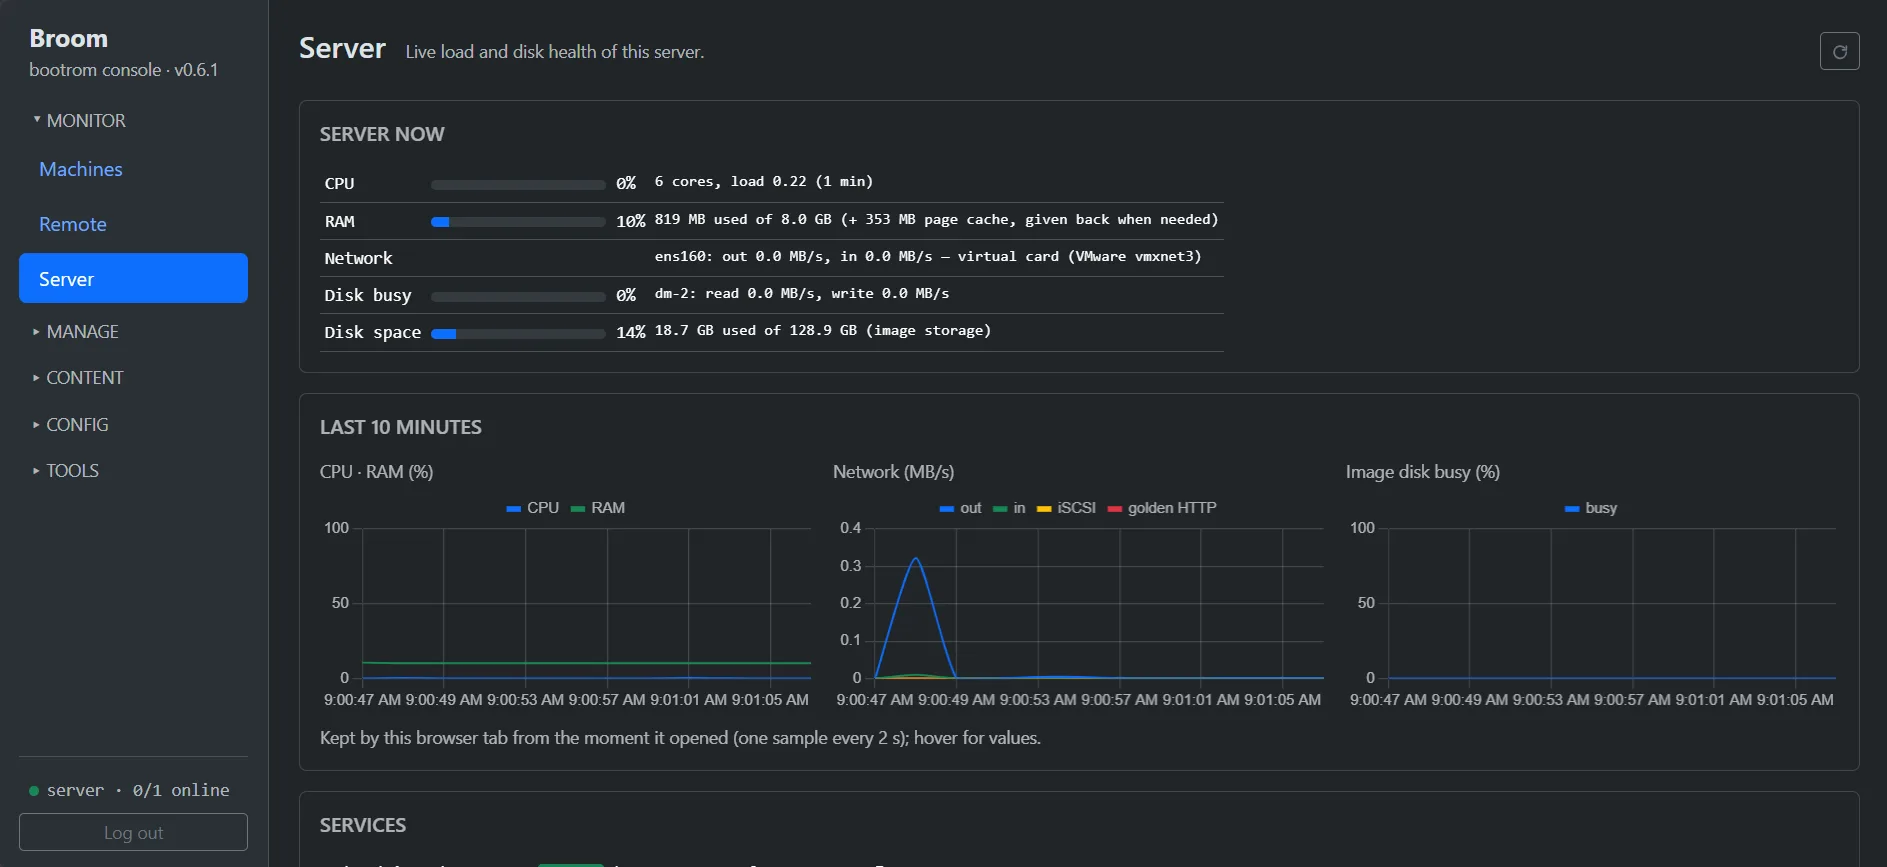
- Health monitoring — CPU, RAM, temperatures and disk health (SMART, bad sectors) of every client and of the server, flagged red when a disk is failing or a PC runs hot; how long each client has been up and how many MB/s it draws from the server; 10-minute charts of the server’s load and the state of each service (DHCP, TFTP, iSCSI).
- Logs in the browser — filter errors, search by PC name, follow a PC live while it boots; no SSH into the server.
- No agent, no internet (optional, Network → DNS) — the server is the room’s DNS and only resolves names for PCs whose agent runs, PCs that just booted and exempt PCs (cashier, staff). A customer who kills the agent, a PC booted without the network, a stranger’s laptop plugged into the LAN: none of them gets online. Also block outbound DNS (ports 53 and 853) on the router.
- Instant image snapshot / rollback, machine groups (each with its own boot menu, images and iSCSI disks), Wake-on-LAN and PC status in the browser.
- Free and open source (Apache-2.0) — no per-PC fee, fine for a commercial café.
What you need
- Server: an x86_64 machine running Linux, disk space for the images, Gigabit LAN to the clients.
- Clients: UEFI PCs with network boot (PXE) first, and an SSD in each (the Windows image is cached and runs there).
- Image: Windows 11 Pro installed in a virtual machine (e.g. VMware).
Steps
1. Start the server
sudo mkdir -p /opt/bootrom && cd /opt/bootrom
sudo curl -fLO https://github.com/morningstar-sudo/broom/releases/latest/download/bootrom-mgmt
sudo chmod +x bootrom-mgmt
sudo ./bootrom-mgmt install-service
journalctl -u bootrom-mgmt -f      # shows the one-time setup code
Open http://<server-ip>/, enter the setup code and set the admin password.
2. Network boot
Pick one:
- Broom’s DHCP: turn DHCP off on the router, then turn on the DHCP server on Broom’s Network page; or
- Keep the router’s DHCP: set next-server / option 66 = the Broom server’s IP and boot file / option 67 =
snponly.efi.
3. Build the Windows image
- Create a VM, install Windows 11 Pro, and at the first setup screen (OOBE) press Ctrl+Shift+F3 to enter Audit Mode.
- Install your software and game launchers, and set things up as the whole room should have them.
- In Broom’s web admin, set the customers’ account and password (Windows → Guest user).
-
In the VM, open PowerShell as Administrator and run:
irm http://<server-ip>/broom-prep-win | iexThe VM prepares itself, runs sysprep and shuts down.
4. Upload the image
On the Images page, upload the whole VM folder (OS = Windows). Broom extracts the disk and publishes the image.
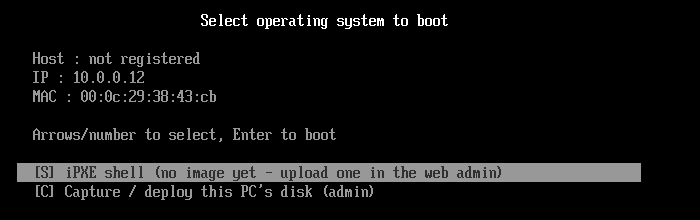
No VM? Capture a client directly. Do step 3 on one of the room’s PCs (it shuts down after sysprep), then
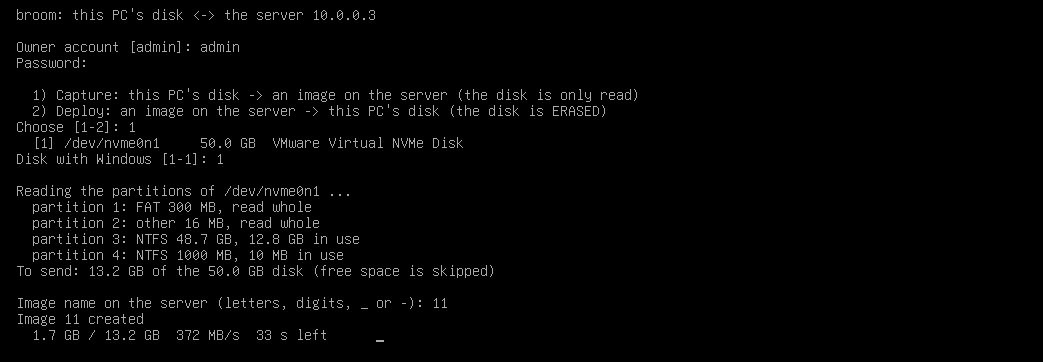
network-boot that PC and pick [C] Capture / deploy at the bottom of the boot menu, then Capture. Choose the disk
and type the image name and an owner account: Broom only reads the disk (writes nothing) and sends only what Windows
uses (a 1 TB disk using 40 GB → about 40 GB sent), then publishes the image. Turn BitLocker off first
(manage-bde -off C:), and keep C: small: every client sees a C: exactly that size.
Edit an image on a real PC. Same menu, Deploy: Broom writes the image onto a PC’s disk (the disk is erased) and the PC boots straight into that Windows. Install / change apps, run the prep command again, then Capture it back.
5. Add the clients and boot
Add the PCs on the Machines page before their first Windows boot — a registered PC with a single internal disk gets its SSD partitioned by Broom on its own. Power them on: the first time a PC downloads the image to its SSD and restarts once; from then on every boot is clean.
PCs with several disks: open Devices → that PC → Disks and press Use as Broom disk on the disk that should hold Windows (nothing to type at the client). Better hide the other disks from customers (for a whole group on the Groups page, or per PC): customers can’t see or write them, so nothing is left behind after a restart.
A new disk in the server: Server → Disks, press Format on the new disk (type its name to confirm). Then pick it when creating an image / iSCSI disk, or move an image / iSCSI disk there with the Server disk column on the Images / iSCSI Disks pages.
Installing games
On the iSCSI Disks page, create an iSCSI disk and choose an update machine. Boot that PC, install or update the games on the iSCSI disk, shut it down properly and press Save. The other PCs get the new version at their next boot. Let only the update machine download game updates — a launcher updating itself on a customer PC fills its SSD and is lost at the restart anyway.
Watching and controlling the clients
Open the Remote page (Monitor group): the screens of every Windows client show as a grid, updated live. Click a PC (or type its name and press Open) to control it. Click the screen before typing. The toolbar buttons send Ctrl+Alt+Del, the Windows key, Alt+Tab and Paste (your clipboard into the client). Chrome / Edge play it smoothly (H.264); on a busy network lower the quality to Low.
Each PC’s health (CPU, RAM, temperatures, disks, bad sectors, uptime, MB/s it is downloading) shows on the Machines page. The Server page has the server’s load with 10-minute charts, disk health and the Services table (DHCP, TFTP, iSCSI up or down). A PC that won’t boot: open Tools → Logs, pick Warn+ or type the PC’s name to see the errors.
FAQ
Is Broom free? Yes. It is licensed Apache-2.0, can be used in a commercial café, and has no per-PC fee.
Do the client PCs need a disk? A Windows image needs an SSD in each PC (the image is cached and runs there). A Linux image also runs on PCs without a disk.
How many PCs? Up to about 100 PCs per server; Broom itself sets no limit. The server’s network and disks decide: up to 30 PCs on 1 Gbps; 30–60 PCs on 10 Gbps with an NVMe disk; 60–100 PCs on two bonded 10 Gbps ports (LACP) or 25 Gbps, PCIe 4 NVMe and 64 GB of RAM or more. Client switches at 1 Gbps with a 10 Gbps uplink, PortFast on. The cafés running it today are all small rooms — add PCs gradually and watch the Server page. Details: Sizing.
Do games with anti-cheat run? FACEIT Anti-Cheat runs with Secure Boot (no MOK needed), TPM 2.0 and HVCI — see the FACEIT guide.
Can the owner see the PCs’ screens? Yes. The Remote page shows every Windows client’s screen at once; click one to control it (mouse, keyboard, Ctrl+Alt+Del, clipboard paste). The client shows no notice while it is watched — if your café’s rules require it, tell your customers.
How does it compare with CCBoot? See Broom vs CCBoot.
Full manual: github.com/morningstar-sudo/broom